
Professional Stucco Repair - The Right Way
In Partnership With

(Left) George Hutchinson, Spring Construction (Right) Judy Pearson, Sun City Resident
Stucco moisture damage in the Lowcountry is a common problem. Too much moisture behind your exterior walls can lead to big problems, like black mold and wood rot.
Many local residents are all too familiar with the stucco related class action lawsuit that settled on April 18, 2019 for just north of $43 million.
With travel halted for most, now is the time for many residents to be focused on making the proper repairs to keep their homes safe, free of health hazards, and protected from further water damage.
Has Your Stucco Siding Been Professionally Inspected?
Your 5-Step Guide
1. Do a visual check for potential damage
2. Hire a good home inspection professional
3. Hire a stucco professional with experience and lots of positive referrals
4. Demand a warranty for the work
5. Don't wait - There are serious risks involved

Contact The Lowcountry’s #1 Stucco Pro Now!

Residents Hire The Best Stucco Professionals
Judy Pearson from the Sun City development recently realized that her stucco siding was beginning to look streaky and, with concern, noticed a strange smell coming from one side of the house.
“George was easy to get along with and honest. I felt like he was answering my questions, and so upfront with everything.”
After she saw visible cracking in the seams of her wall, Judy suspected it could be a moisture problem and called for a thorough home inspection.
Judy explained that, like most others in her community, her problems began with “the shabby original stucco construction - they just slapped it up. They didn’t use the right flashing around the windows.”

Photo: Mold collecting around the window due to excessive moisture from poorly installed Stucco
The home inspection confirmed that Judy’s stucco was compromised, and Judy quickly attempt to find the best siding contractor in the area to repair her home. She spoke to family, friends, and neighbors for advice and referrals. Through this process Judy learned that Spring Construction is one of the most well reviewed and highly sought after siding repair specialists in the Lowcountry.
Judy called George Hutchinson of Spring Construction to help diagnose the damage, and provide a complete solution to her home’s exterior problems. In Judy’s words, “George was easy to get along with and honest. I felt like he was answering my questions, and so upfront with everything.”
Although most homeowners, Judy included, would prefer to simply patch the problem areas around – usually around the window exteriors where the mold and moisture was discovered - Judy learned that a patch job won’t prevent more water from invading the walls at a later date.
When asked why Judy decided to repair her entire wall, she told us “Peace of mind. Where the original wall was put up incorrectly on one side of the home, it’s probably also incorrectly installed around the whole house.”
“Insulation, flooring, sheetrock, cabinets, anything and everything that is attached to an exterior wall that has been exposed to that level of humidity and that mold level for so long is obviously going to intrude further in to the house if it’s left unchecked. It only gets more expensive if you wait.”
After working with George and his team at Spring Construction, Judy told us that she loved the finished product and particularly appreciated George’s candor and promptness, “When he said he was going to show up, he showed up.”
Judy’s final thoughts on the finished product - “I liked it a lot. They did a good job. George and his workers were really good. And I already have recommended George to a friend and neighbor. Yes, definitely I’m happy. I’m glad it’s done.”
Suspect You Might Have Moisture Problem?
Hire A Home Inspection Expert
Cost: About $200-$300
Diagnosis: The professional will confirm higher than normal or appropriate moisture levels behind the wall.
Location: They will communicate where the water is settling behind the stucco. But, only a siding installation professional can tell you where the water is breaching the walls.
Action: The inspector will communicate if your stucco siding needs to be remediated immediately.

Photo: Drilled holes in the stucco siding denote previous testing for moisture damage
Call A Highly Rated Stucco Professional
Cost: Varies based on the damaged wall’s square footage
Repairing: A good stucco repair expert will review your home inspector’s moisture reading and if damage was found, the expert will likely advise that the entire wall on the side of the home be replaced.
Options: Patching only the area where the water is settling, or otherwise repairing only small sections of a stucco wall, will almost definitively lead to more damage. If all of the cracked seams allowing water behind the wall aren’t fixed, water continues to trickle down to the newly patched area, and the cycle starts again. The only way to be 100% sure you’re remediating the problem is to replace the siding on the entire side of the home.
Action: The stucco expert will communicate the cost and timeline for the project. Most walls can be repaired in 2-3 weeks, depending on the weather.

Photo: Patching around windows might seem like a cost effective option, but it won’t prevent future moisture damage
Waiting Can Lead To Big Problems
Serious Health Concerns
Most homeowners understand that mold exposure can be extremely unhealthy.
According to the CDC, moldy environments may cause a variety of health effects. Exhibited symptoms like a stuffy nose, wheezing, and red or itchy eyes, or skin irritation are all common responses. Homeowners with allergies, asthma, or any other respiratory difficulties may have an even more intense reaction like fever and shortness of breath.
Accelerated Property Damage
“Insulation, flooring, sheetrock, cabinets, anything and everything that is attached to an exterior wall that has been exposed to that level of humidity and that mold level for so long is obviously going to intrude further in to the house if it’s left unchecked. It only gets more expensive if you wait. A simple stucco wall repair might end up costing upwards of $40,000 when we have to replace every single stud.” Bryan Thompson, Foreman at Spring Construction
How You Can Identify Moisture Damage
Cracking At The Seams

Photo: Severely cracked stucco wall seam in Sun City
Tip: If you can fit a business card in the cracked seam, water is entering just as easily. It might seem like a small entry point, but it’s a big problem.
Visible Streaks And Staining
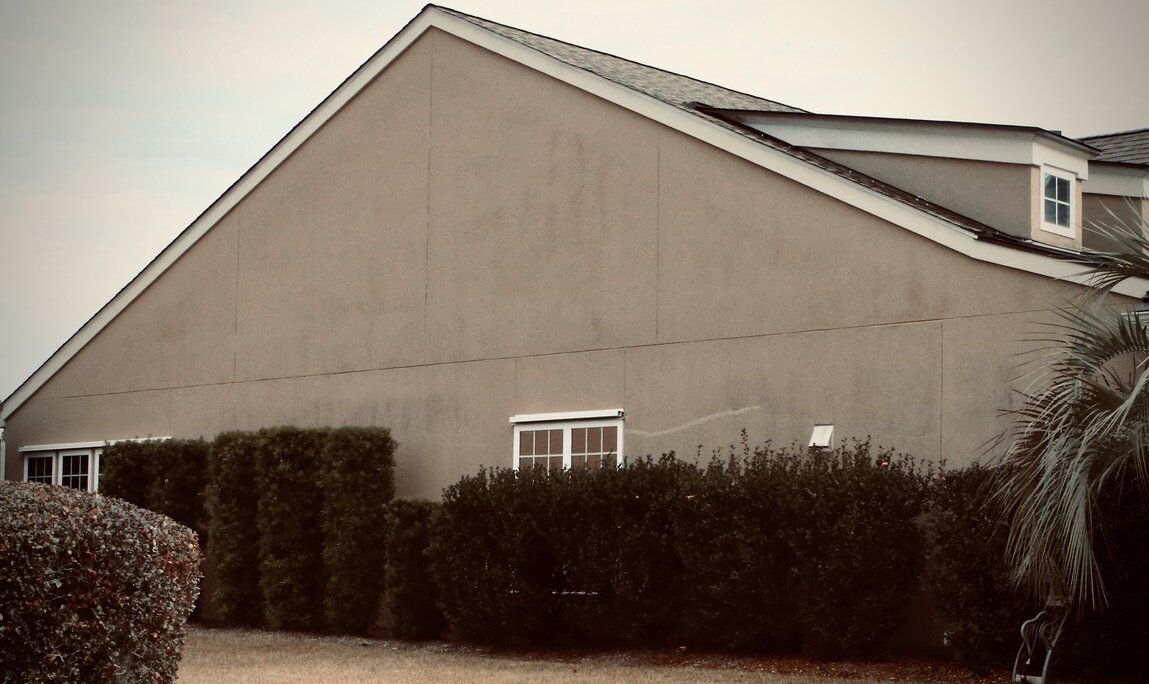
Photo: Moisture soaked stucco siding
Tip: If the side of your home looks stained or water logged, you have a problem.
Horizontal or Vertical Cracking

Photo: Horizontal or vertical cracking likely means there is moisture behind your wall
Tip: Any cracking in the exterior walls likely means that moisture has set in.
Do It The Right Way:
Spring Construction’s 9 Step Process
Repairing and rebuilding is serious business for George and his clients. Repairing stucco walls the right way should be done methodically, and swiftly.
• Diamond blade cuts in the damaged stucco to allow it to be removed
• Once the old stucco has been removed, carefully inspect the (sheathing) plywood on the side of the home
• Remove any wet, moldy, or black sheathing
• Check the insulation and studs to make sure there’s no moisture damage beyond the sheathing
• Install new sheathing and call for the first inspection
• After the first inspection, flash the windows, and put up not just one but two layers of felt paper and call for the second inspection
• Add mesh undercoating to the side of the home and call for the third inspection
• Begin the stucco application. The best option is a three coat, 7/8 inch hard coat, conventional stucco system. Anything less could more rapidly deteriorate and allow for moisture
• Layer 1: Approximately 1/4 - 3/8 inch thickness and allow for it to dry overnight
• Layer 2: Another 3/8 inch thickness - A brown coat that is smoothed by hand and dried overnight
• Layer 3: The final 1/4 inch color coat - a mixture of the texture and color. Spring Construction provides any color that a client wants to put up, usually a color is chosen to match the house color
• Final phase: Caulking and clean up

